How to Grow Weed for Beginners
Growing your own cannabis at home is more accessible than ever. Whether you want to save money, control what goes into your plants, or simply enjoy the rewarding process of cultivation, understanding the fundamentals makes all the difference between a frustrating failure and a successful harvest.
This guide walks you through every step of cannabis cultivation—from selecting seeds to storing your cured product. You’ll learn how to grow weed with confidence, avoid common beginner mistakes, and develop skills that improve with each grow cycle.
Quick Start: Growing Weed Overview
Before purchasing seeds or equipment, take time to plan your approach. A few strategic decisions now will save you significant time, money, and frustration later.
Define Your Goals and Available Grow Space
Start by clarifying what you want to achieve:
Personal medicinal use may require specific cannabinoid profiles
Recreational consumption offers more flexibility in strain selection
Maximum yield demands investment in equipment and technique
Your grow space directly impacts your options. Here’s what to expect:
Space Type | Typical Yield | Startup Cost |
|---|---|---|
Small closet | 1-3 ounces | $300-500 |
4x4 grow tent | 8-16 ounces | $500-1000 |
Outdoor plot | 1-5 pounds per plant | $100-300 |
A basic indoor setup can start around $300, covering lights, ventilation, and growing medium. Semi-automatic systems like bubbleponics increase yields through oxygenation but add complexity and cost.
Check Local Laws Before You Start Growing
Cannabis cultivation laws vary dramatically by jurisdiction. Some areas permit up to six plants per household, while others maintain complete prohibition. Before purchasing anything:
Verify your local plant count limits
Understand requirements for secure, childproof setups
Research proper waste disposal regulations
Confirm whether home cultivation requires permits
Ignoring local regulations can result in serious legal consequences, regardless of how many states have legalized cannabis.
Decide Indoor or Outdoor Grow Method
Both methods have distinct advantages:
Indoor growing provides:
Precise environmental control
Year-round cultivation cycles
Protection from pests and weather
Higher per-plant investment costs
Growing outdoors offers:
Free sunlight (the best grow light available)
Larger potential yields
Lower equipment costs
Dependency on climate and seasons
If budget allows, indoor cannabis growing gives you predictable results and faster learning cycles. Outdoor growers must time harvests before cold weather arrives, selecting quick-flowering strains appropriate for their climate.
Choose Cannabis Seeds
Selecting the right genetics is one of the most important decisions you’ll make. The wrong strain can mean fighting your grow space or missing your desired effects entirely.
Pick Strain Based on Effects and Space
Cannabis sativa strains typically produce energizing, cerebral effects, while indica varieties tend toward relaxation and body sensations. Consider:
Desired effects: medicinal specificity may require precise cannabinoid profiles
Available height: compact strains suit small spaces
Flowering time: shorter cycles mean faster harvests
Most cannabis strains fall somewhere on the indica-sativa spectrum. When growing cannabis indoors with limited ceiling height, look for naturally compact varieties or plan to train taller plants aggressively.
Choose Feminized or Autoflower Seeds for Predictability
For beginners, two seed types stand out:
Feminized seeds ensure you get female plants that produce the smokable cannabis buds you want. Without feminization, roughly half your plants would be male plants that don’t produce usable flower and can pollinate your females.
Autoflowering seeds flower automatically after a set time, regardless of light schedule. They:
Grow faster with smaller yields
Skip the complexity of light scheduling
Work well in compact spaces
Finish in 8-10 weeks from seed
Photoperiod feminized seeds yield bigger plants but require you to manage 18 hours of light during vegetative growth and switch to 12 hours to trigger flowering. Auto flowering plants remove this variable entirely.
Buy Seeds from a Reputable Seed Bank
Quality genetics matter. Reputable seed banks provide:
Germination guarantees
Strain-specific data on height, yield, and potency
Feminized seeds ensure accuracy
Consistent genetic expression
Avoid unknown sources where low-quality genetics lead to disappointing results despite perfect growing conditions.

Germination Process for Cannabis Seeds
The germination process transforms dormant seeds into cannabis seedlings ready for growth. Success rates exceed 90% when you follow proper technique with quality seeds.
Soak Seeds 12–24 Hours Before Planting
Begin by dropping seeds into a glass of room-temperature water. This softens the outer shell and signals the seed to activate. Seeds that sink after 12-24 hours are typically viable; floaters may still germinate but have lower success rates.
Use Damp Paper Towel Method Until Taproot Appears
The paper towel method remains the most reliable approach to germinate cannabis seeds:
Fold a damp (not soaking) paper towel
Place seeds between layers
Set between two plates to exclude light
Check daily for taproot emergence
Maintain consistent moisture
Taproots typically appear within 1-5 days. You’re looking for a white root extending 5-10mm from the seed.
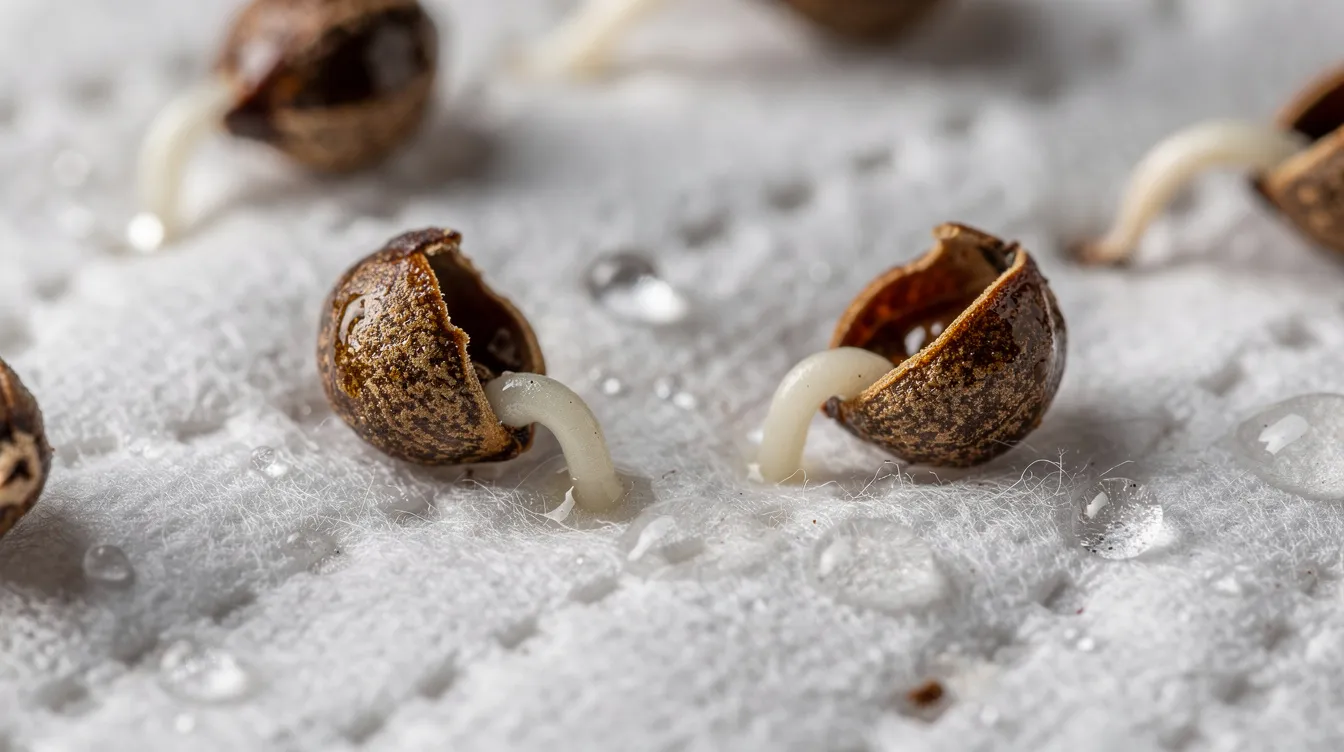
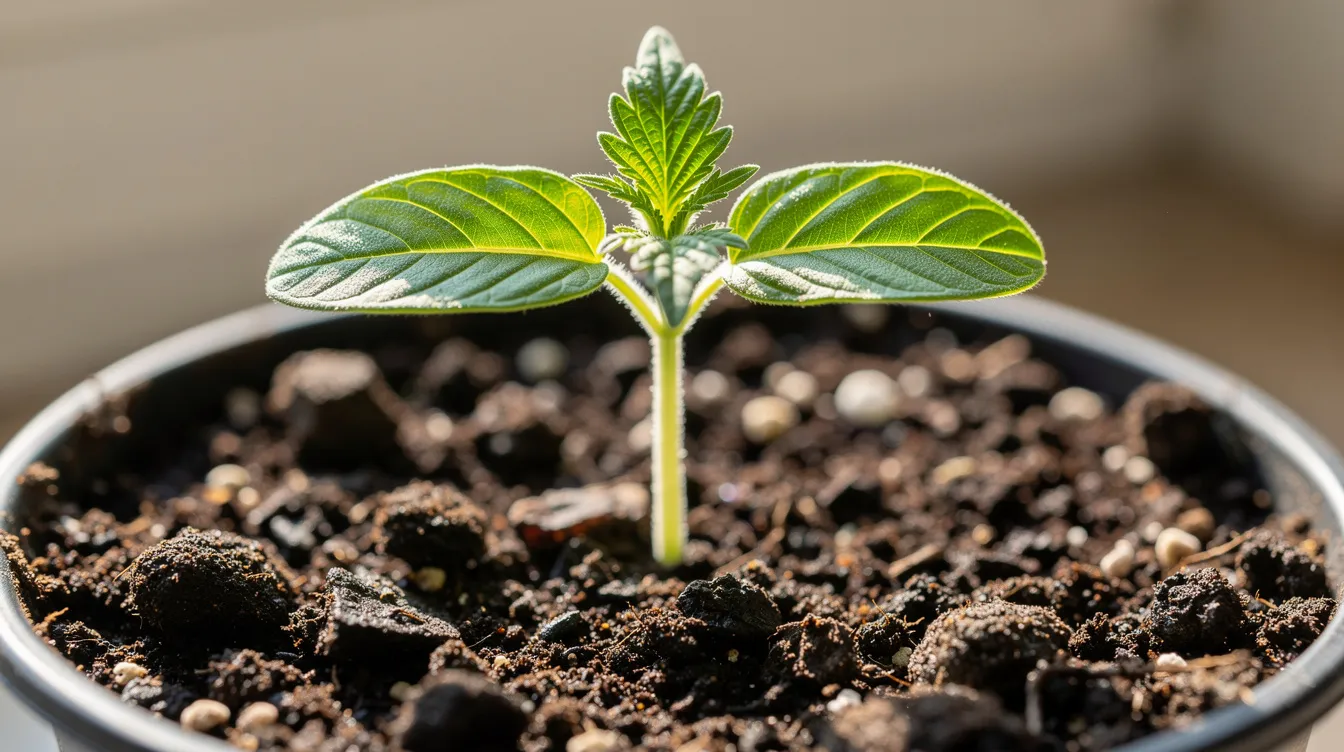
Transfer Sprouted Seeds to Small Starter Pots
Once taproots appear:
Fill small starter pots with moist growing medium
Create a 5mm deep hole
Place seed root-down into the hole
Cover lightly with medium
Keep soil moist but not saturated
Young plants are fragile. Avoid intense light—fluorescent tubes or gentle LEDs work better than powerful grow lights at this stage. Direct sunlight or strong LEDs can burn delicate cannabis seedlings before they establish.
Choose a Growing Medium
Your growing medium affects watering frequency, nutrient delivery, and root health. Each option involves tradeoffs between simplicity and performance.
Use Quality Potting Soil for Beginner Reliability
For most growers starting out, nutrient rich soil offers the most forgiving experience:
Built-in nutrients reduce early feeding complexity
Natural buffering forgives pH mistakes
Familiar watering and care techniques
Well-aerated “super soil” mixes work especially well
Target soil pH between 6.0-7.0 for optimal nutrient availability. Cannabis plants thrive in soil that feels moist but never soggy—overwatering causes more beginner failures than any other single mistake.
Consider Coco Coir or Hydro for Faster Growth
As you gain experience, alternative mediums unlock faster growth:
Coco coir provides:
Superior aeration and water retention
Faster vegetative growth
More frequent watering requirements
Need for complete nutrient supplementation
Hydroponics delivers:
20-30% higher yields compared to soil
Nutrient-water solutions at pH 5.5-6.5
Constant monitoring requirements
Risk of system failures affecting plants
The complexity increase is significant. Hydroponic systems demand vigilant monitoring to prevent nutrient deficiencies and equipment failures.
Ensure Pots Provide Good Drainage
Regardless of medium, drainage is critical. Roots need oxygen as much as water. Ensure:
Pots have multiple drainage holes
Excess water flows freely
No standing water collects in trays
Root zones cycle between moist and slightly dry
Grow Cannabis Indoors: Setup and Lights
A proper indoor growing environment gives you complete control over your plants’ life cycle. The right equipment creates ideal conditions year-round.
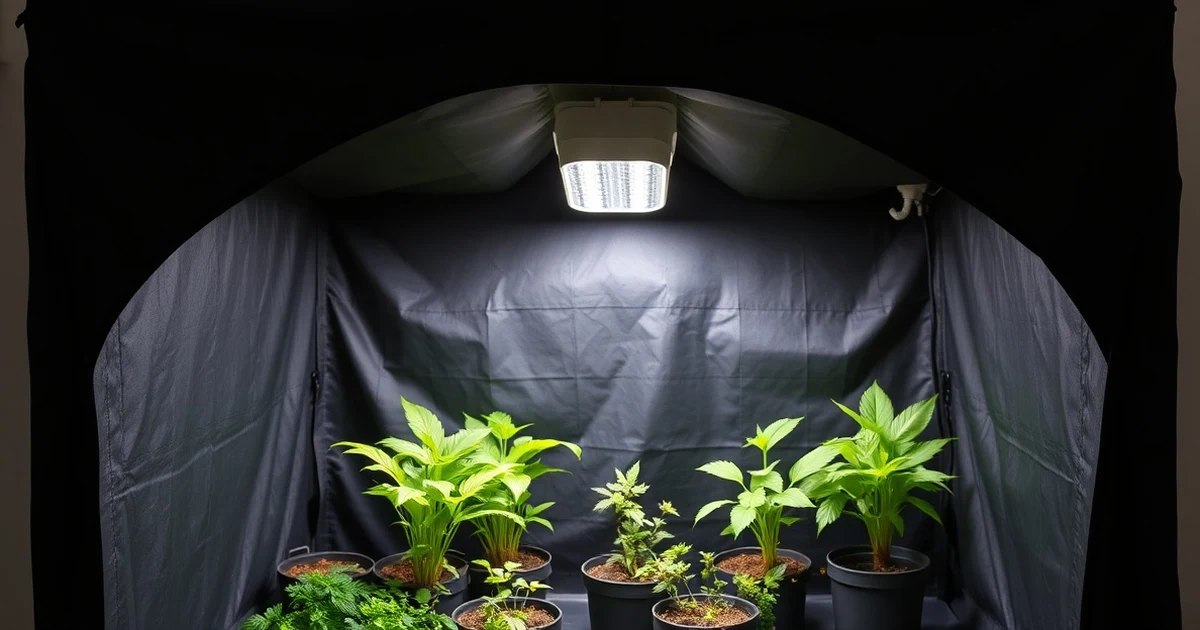
Select a Grow Tent Sized to Your Plant Count
Grow tents provide contained, reflective environments perfect for indoor plants. Common sizes:
Tent Size | Plant Capacity | Best For |
|---|---|---|
2x2 feet | 1-2 plants | Beginners, small spaces |
4x4 feet | 4-6 plants | Most home growers |
5x5 feet | 6-9 plants | Larger operations |
A dedicated grow room works similarly but requires more setup effort. Tents simplify light containment, odor control, and environmental management.
Install Exhaust Fan and Passive Air Intake
Fresh air exchange prevents heat buildup, controls humidity, and strengthens stems:
Exhaust fan: pulls hot, humid air out of the tent
Passive intake: lower vents allow fresh air entry
Oscillating fan: simulates wind, strengthening stems
Maintain slight negative pressure—air should pull inward through passive intakes. This also helps contain odors when using carbon filters.
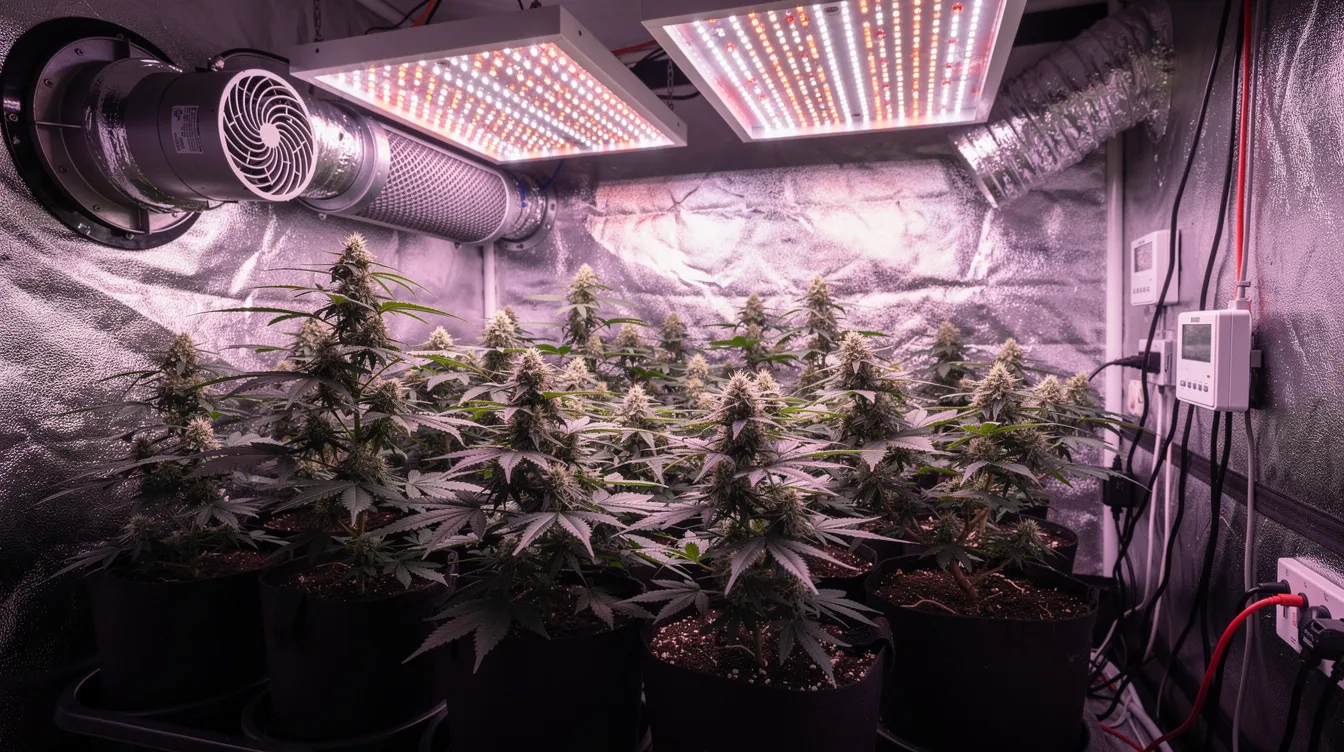
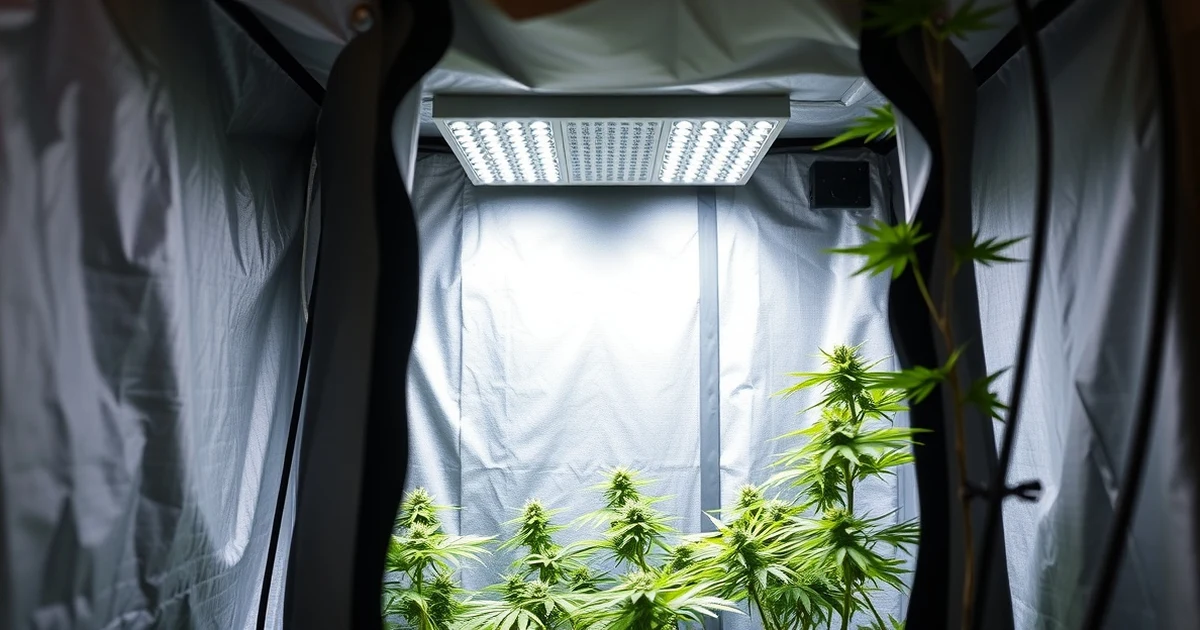
Hang Full-Spectrum LED Grow Lights at Recommended Height
LED grow lights have revolutionized indoor cannabis growing:
Full-spectrum output mimics natural sunlight
Energy savings up to 50% compared to HPS
Lower heat output reduces cooling needs
Blue light dominant spectrums support vegetative growth
Red-heavy spectrums optimize flowering
Position lights 18-24 inches above canopy for young plants, adjusting as they grow. Light intensity directly correlates with bud development—more light generally means bigger yields up to the point of light stress.
Vegetative Stage Care for Cannabis Plants
The vegetative stage builds the foundation for flowering. During this 4-8 week phase, your plant focuses energy on developing roots, stems, and leaves that will later support heavy cannabis buds.
Set Lights to 18 Hours On, 6 Hours Off
Photoperiod cannabis plants need extended light to remain in vegetative growth. Use timers to maintain consistent 18/6 cycles. This mimics long summer days, signaling the plant to grow rather than flower.
Autoflowering varieties can run on various schedules, but many growers use 18/6 or 20/4 for auto flowering plants as well.
Feed Higher Nitrogen (N) Nutrient Formula
During vegetative phase, cannabis plants require increased nitrogen n for:
Chlorophyll production
Protein synthesis
Lush, dark green leaves development
Rapid foliage expansion
A typical vegetative NPK ratio looks like 3-1-2, emphasizing nitrogen while providing phosphorus and potassium baseline. Follow manufacturer schedules precisely—too much nitrogen causes toxicity, while deficiency shows as yellowing lower leaves.
Water When Topsoil Feels Dry to the Touch
Overwatering remains the most common beginner mistake. Develop this habit:
Insert finger 1-2 inches into soil
Water only when dry at that depth
Water thoroughly until runoff appears
Wait until dry again before repeating
Keep soil moist but never saturated. Healthy roots need oxygen between waterings. Cannabis plants thrive with wet-dry cycles rather than constant moisture.
Train Plants to Develop an Even Canopy
Training techniques expose more bud sites to light, potentially boosting yields 20-50% without additional equipment costs. Even canopies ensure all tops receive similar light intensity, producing more consistent healthier plants.
Training and Pruning During Vegetative Stage
Plant training manipulates natural growth patterns to maximize your growing environment efficiency.
Top Plants After Three to Five True Nodes
Topping removes the main growing tip, forcing the plant to develop multiple main colas instead of one:
Wait until 3-5 true nodes develop
Cut cleanly above a node
Two new main branches will emerge
Repeat if desired for bushier structure
This technique creates 2-4x more main colas, dramatically increasing potential yield.
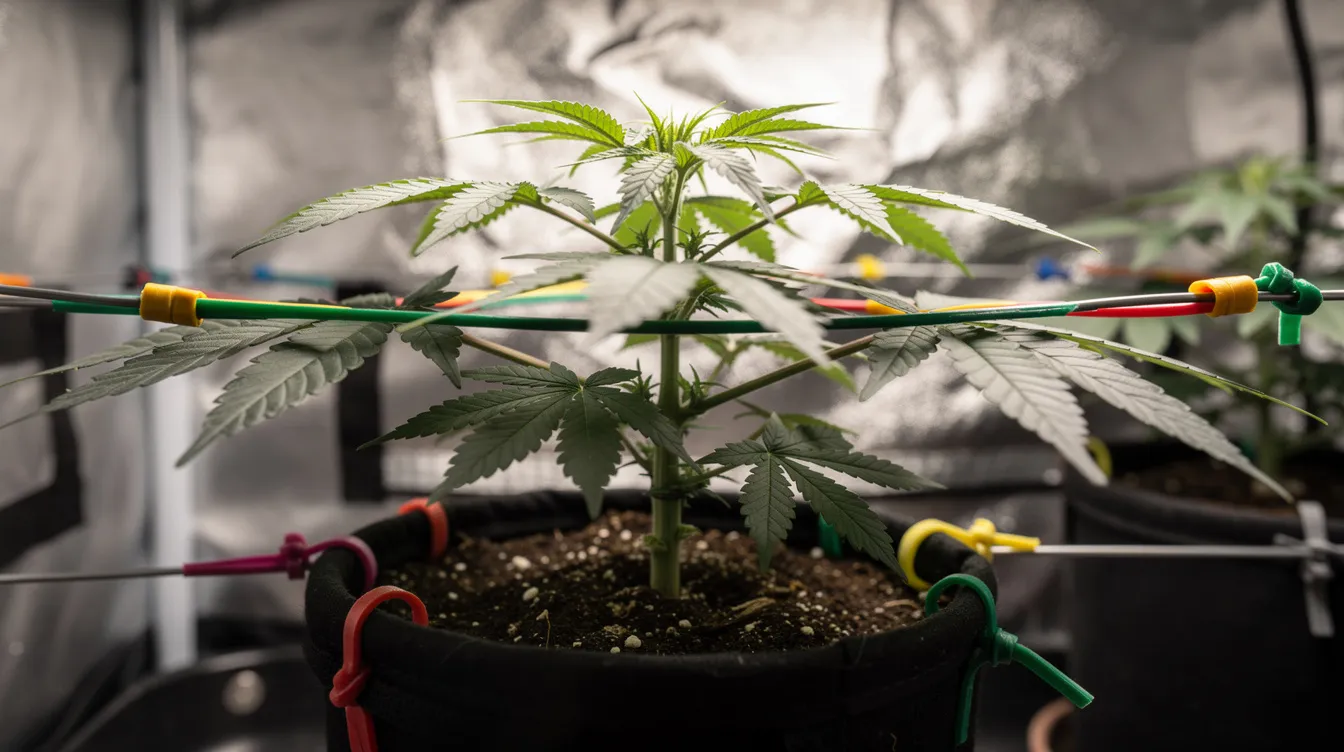
Apply Low-Stress Training Ties to Branches
Low-stress training (LST) bends branches without cutting, exposing lower growth to light:
Use soft ties or plant wire
Never snap or damage branches
Create an even, flat canopy
Adjust ties as plant grows
Remove Weak Lower Growth to Focus Energy
Removing small, shaded growth redirects energy to productive top sites:
Remove yellowing lower leaves
Trim small branches that won’t reach canopy
Focus plant resources on main colas
Improve airflow to prevent issues
LST Step-By-Step
Here’s the practical process for low-stress training growing plants:
Bend Main Branch Gently Toward Canopy
After topping or when the main stem is tall enough, gently bend it toward the edge of your pot. Work slowly—you’re trying to reposition, not break.
Secure Branch with a Soft Tie
Use soft plant ties, pipe cleaners, or coated wire to hold the bent branch in position. Anchor to your pot’s rim or use purpose-made plant stakes.
Tighten Ties Gradually Over Weeks
As the plant grows, continue adjusting ties to maintain an even canopy. Lower branches will grow upward, creating multiple tops at similar heights. This ongoing maintenance produces dramatically more even growth than untrained plants.
Flowering Phase: Managing Flowering Plants
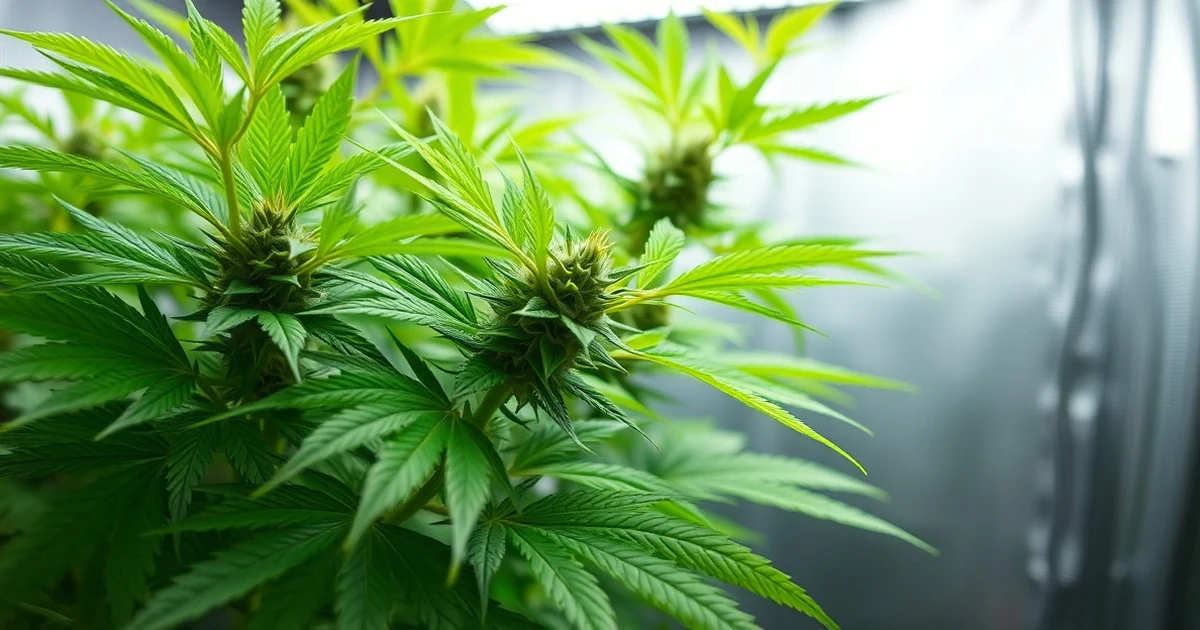
The flowering stage transforms vegetative growth into the cannabis buds you’ve been working toward. This 8-10 week flowering period requires adjusted care.
Switch Lights to 12 Hours On, 12 Hours Off
For photoperiod plants, changing to 12/12 light triggers flowering. This mimics autumn’s shorter days, signaling the plant to reproduce. The flowering cycle begins within 1-2 weeks of the switch.
Autoflowering varieties flower based on age regardless of light schedule, typically starting around week 3-4 from seed.
Lower Nitrogen and Increase Phosphorus and Potassium
Flowering plants need different nutrition than vegetative ones:
Reduce nitrogen: excess causes dark green leaves and reduced bud development
Increase phosphorus (P): supports root and flower development
Boost potassium (K): improves overall plant resilience
Shift from 3-1-2 vegetative ratios toward 1-3-4 flowering formulas. P and potassium k become primary drivers of bud quality during this phase.
Monitor Trichomes to Time Harvest
Trichomes—the tiny resin glands covering buds—indicate ripeness:
Trichome Appearance | Readiness |
|---|---|
Clear | Too early |
Mostly cloudy/milky | Peak THC |
Amber mixing in | More sedative effects |
Use a jeweler’s loupe (30-60x magnification) to examine trichomes. Harvest when 70-90% appear cloudy for maximum potency. Cutting early significantly reduces yield and effects.
Flowering Maintenance
The final weeks demand careful attention to environmental conditions.
Support Heavy Buds with Stakes or Nets
Dense cannabis buds can weigh 1-2kg per plant in late flower. Without support:
Branches snap under weight
Buds contact soil, risking contamination
Light penetration decreases
Use bamboo stakes, SCROG nets, or plant yo-yos to support heavy colas.
Control Humidity to Prevent Bud Rot
Bud rot (Botrytis) destroys harvests in high humidity. During flowering:
Maintain 40-50% relative humidity
Increase airflow around dense buds
Inspect regularly for gray mold
Remove affected material immediately
High humidity enables spore germination. Prevention through environmental control beats treatment every time.
Eliminate Light Leaks During Dark Periods
Light during the dark period can:
Revert flowering plants to vegetative growth
Cause hermaphrodite development (male and female plants traits)
Stress plants and reduce quality
Seal your grow space completely. Even small indicator lights can disrupt the flowering cycle.
Harvesting, Drying, and Curing
Proper post-harvest handling can improve potency 20-30% while preventing harsh, unpleasant smoke. Don’t rush these final steps.
Harvest When Trichomes Appear Mostly Cloudy
Timing matters more than calendar dates. Different strains mature at different rates. Use your loupe to confirm 70-90% cloudy trichomes across multiple bud sites.
Place Trimmed Branches Upside Down to Dry
After cutting, hang plants upside down in a controlled environment:
Temperature: 18-24°C (65-75°F)
Humidity: 45-55%
Complete darkness
Gentle air circulation
Drying takes 5-10 days. Stems should snap (not bend) when ready. Rushing this step traps moisture and leads to mold.
Place Dry Buds in Airtight Jars for Curing
Once dry, trim buds from stems and place in glass jars for curing cannabis properly:
Fill jars 75% full
Store in cool, dark location
Maintain 58-62% humidity (use humidity packs if needed)
Cure minimum 2-4 weeks
Curing cannabis allows chlorophyll breakdown and terpene development, producing smoother smoke and enhanced effects.
Burp Jars Daily for Two Weeks
During the first two weeks:
Open jars daily for 5-15 minutes
Allow moisture and gases to escape
Check for ammonia smell (indicates excess moisture)
Return to sealed storage
After two weeks, reduce burping frequency. Longer cures (4-8 weeks) continue improving quality. Store properly cured buds in glass jars for 6-12 months without significant degradation.
Nutrients and Nitrogen (N) for Cannabis Cultivation
Understanding essential nutrients prevents deficiency problems while avoiding toxicity that damages plants.
Use Higher Nitrogen Formulations During Vegetative Stage
Vegetative growth demands nitrogen for:
Leaf development
Stem strength
Overall plant growth
Chlorophyll production
Standard vegetative formulas (like 3-1-2 NPK) provide appropriate ratios. Signs of nitrogen deficiency include yellowing lower leaves that progress upward.
Reduce Nitrogen During Flowering to Improve Bud Quality
Excess nitrogen during flower causes problems:
Dark green leaves that curl
Reduced bud development
Extended flowering times
Harsh smoke in final product
Transition to bloom formulas emphasizing phosphorus and potassium. “Less is more” applies during flowering—plants need fewer total nutrients as they mature.
Follow Manufacturer Feeding Schedules Precisely
Nutrient companies provide feeding schedules for good reason. Start at 50-75% recommended strength and adjust based on plant response. Overfeeding causes:
Nutrient lockout
Burned leaf tips
Stunted growth
Wasted money
Premixed nutrient kits simplify the process for beginners, providing appropriate ratios throughout the life cycle.
Grow Indoors: Environmental Controls
Precise environmental control separates mediocre results from potent weed. Small investments in monitoring equipment pay dividends.
Maintain Vegetative Temps Around 20–27°C
During vegetative phase, warmer temperatures drive faster growth:
Optimal range: 20-27°C (68-80°F)
Daytime slightly warmer than nighttime
Avoid temperature swings exceeding 10°C
Maintain Flowering Temps Around 18–25°C
Flowering plants prefer slightly cooler conditions:
Optimal range: 18-25°C (64-77°F)
Cooler nights can enhance coloration
Excessive heat reduces terpene production
Keep RH 40–70% in Veg, 40–50% in Flower
Humidity requirements change throughout growth:
Growth Phase | Humidity Range |
|---|---|
Seedling | 65-70% |
Vegetative | 40-70% |
Flowering | 40-50% |
Late flower | 30-40% |
Higher humidity supports transpiration during vegetative growth. Lower humidity during flowering prevents mold and bud rot in dense colas.
Pest, Disease, and Common Problems
Prevention beats treatment. Daily monitoring catches issues before they become disasters.
Inspect Plants Daily for Pests or Damage
Common indoor threats include:
Spider mites: tiny dots on leaf undersides, webbing
Aphids: small green or white insects clustering
Fungus gnats: small flies around soil surface
Powdery mildew: white powder on leaves
Check both upper and lower leaf surfaces. Problems multiply rapidly in controlled environments.
Treat Infestations Promptly with Appropriate Products
When growing cannabis at home, organic options work well:
Neem oil for most insects
Insecticidal soaps for soft-bodied pests
Beneficial insects for ongoing control
Environmental adjustments (lower humidity, increased airflow)
Never spray during flowering if possible—residues affect final product quality.
Remove Moldy Material Immediately to Prevent Spread
Mold spreads through spores. If you find:
Gray or brown patches in buds
Fuzzy growth on stems
Unusual discoloration
Remove affected material immediately. Isolate if possible. Increase airflow and reduce humidity. Do not smoke moldy cannabis under any circumstances.
Growing Cannabis Outdoors
Outdoor plants benefit from nature’s free resources but face unique challenges.
Choose a Sunny Site with at Least Six Hours Direct Sun
Cannabis needs abundant light. Select locations with:
Minimum 6 hours direct sunlight daily
Southern exposure (Northern Hemisphere)
Protection from extreme wind
Privacy from neighbors
More sun equals bigger yields. Direct sunlight provides full-spectrum light that even the best LED grow lights can’t perfectly replicate.
Plant After Last Expected Frost Date
Outdoor growers must time their season carefully:
Start seeds indoors 4-6 weeks before transplant
Move outdoors after frost danger passes
Select quick-flowering strains for short seasons
Plan harvest before autumn cold arrives
In temperate zones, May planting allows harvest by October for most strains.
Protect Plants from Animals and Extreme Weather
Outdoor plants face threats indoor plants avoid:
Deer, rabbits, and other herbivores
Heavy rain damaging buds
Wind stress and breakage
Theft from humans
Use fencing, netting, and strategic placement. Growing outdoors successfully often means growing discreetly.
Yield Expectations and Post-Harvest Storage
Realistic expectations prevent disappointment. Proper storage maintains quality.
Estimate Yield Conservatively Per Plant Based on Strain
Indoor yields typically range:
0.5-1g per watt of light
400W LED system: 200-400g total
Strain genetics significantly impact potential
Growing skill improves results over time
Most growers overestimate first-grow yields. Conservative estimates reduce disappointment while experience builds.
Store Cured Buds in Cool, Dark Airtight Containers
After successful harvest and cure:
Use glass jars with airtight seals
Store in cool, dark locations
Maintain 58-62% humidity with packs
Avoid temperature fluctuations
Properly stored cannabis maintains potency for 6-12 months. Heat, light, and humidity degrade THC and terpenes over time.
Label Jars with Strain and Harvest Date
Organization matters when growing multiple strains:
Strain name and genetics
Harvest date
Cure start date
Personal notes on effects
This information helps refine your smoking cannabis preferences and improve future grows.
Legal, Safety, and Responsible Cultivation
Responsible growing protects you and your community.
Verify Permit Limits and Plant Counts Locally
Laws change frequently. Before each grow:
Confirm current plant limits
Understand possession limits
Know your rights during inspections
Stay compliant with local regulations
Keep Grow Area Secure and Childproof
Safety requirements typically include:
Locked doors preventing child access
Secure storage for nutrients and chemicals
Proper electrical installations
Fire safety equipment nearby
Dispose of Waste Per Local Regulations
Plant waste, especially from failed or male plants:
May require specific disposal methods
Should not enter regular recycling
Must be handled responsibly
Can attract unwanted attention if mishandled
Quick Troubleshooting Checklist
When problems appear, systematic diagnosis beats random changes.
Test Soil pH and Adjust if Outside 6.0–7.0
pH outside optimal range causes nutrient lockout regardless of what you feed. Before adjusting nutrients:
Test runoff pH
Compare to optimal range (6.0-7.0 soil, 5.5-6.5 hydro)
Adjust input water pH as needed
Retest after adjustment
Check Leaf Color to Detect Nutrient Deficiencies
Visual symptoms guide diagnosis:
Symptom | Likely Cause |
|---|---|
Yellow lower leaves | Nitrogen deficiency |
Dark green, curling | Too much nitrogen |
Purple stems | Phosphorus issue or genetics |
Brown leaf edges | Potassium or burn |
Address one issue at a time to identify what actually helps.
Document Changes and Adjust One Variable at a Time
Keep a grow journal recording:
Feeding schedules and amounts
Environmental conditions
Training and pruning dates
Problem observations and solutions
Few weeks of documentation reveals patterns. Changing multiple variables simultaneously makes diagnosis impossible.
Key Takeaways
Growing your own cannabis rewards patience and attention to detail. Remember:
Start with quality feminized or autoflowering seeds from reputable sources
Control your growing environment for consistent results
Match nutrients to growth phase—high nitrogen n vegetative, high P and potassium k flowering
Monitor for problems daily; prevention beats treatment
Proper drying and curing cannot be rushed
Whether growing indoors or outdoors, success comes from understanding plant needs and responding appropriately. Your first grow teaches more than any guide can—embrace the learning process.
Start with one or two plants to master the basics before scaling up. Keep detailed notes, learn from mistakes, and enjoy the journey from seed to smoking cannabis you grew yourself.
Related Articles
Frequently Asked Questions

Written by
The Green Treasure Editorial Team
Independent cannabis journalism backed by science. We cover terpenes, vaporizers, edibles, growing and health.
Stay in the green loop
Expert guides, terpene science, growing tips, and gear reviews — delivered to your inbox. No spam, ever.
No spam. Unsubscribe anytime.