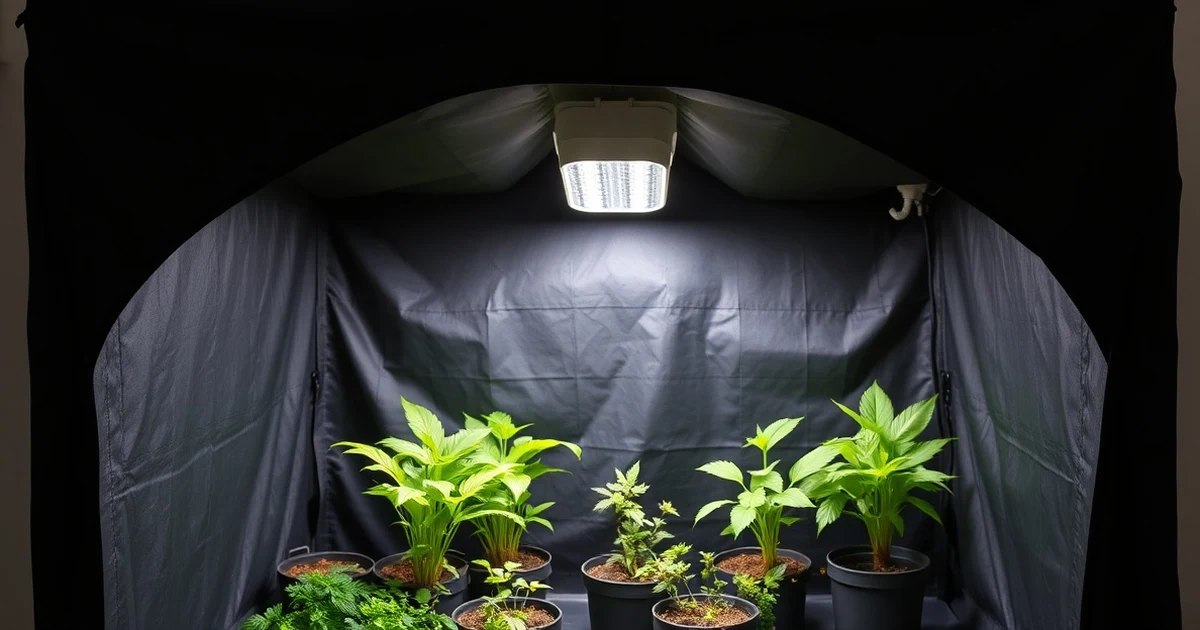
Growing cannabis successfully means understanding the plant's biology and working with it rather than against it. Whether you are setting up your first indoor grow or refining an existing setup, the principles that separate mediocre harvests from exceptional ones are consistent and learnable.
\\\\\\\\\\\\\\\\n\\\\\\\\\\\\\\\\nThis guide covers all aspects of cannabis cultivation at a level of detail suited for growers who want to move beyond basic instructions: how to grow weed step by step medium selection, nutrient management, light cycles, training techniques, growing in a tental control, and harvest timing. For a simplified version covering just the fundamentals, see our beginner's growing guide.
\\\\\\\\\\\\\\\\n\\\\\\\\\\\\\\\\nUnderstanding What Cannabis Needs
\\\\\\\\\\\\\\\\n\\\\\\\\\\\\\\\\nCannabis is a C3 photosynthesis plant that evolved in high-light, well-drained environments across Central Asia and equatorial regions. Its requirements are specific:
\\\\\\\\\\\\\\\\n\\\\\\\\\\\\\\\\n- \\\\\\\\\\\\\\\\n
- Light: High intensity, appropriate spectrum, correct photoperiod (for photoperiod strains) \\\\\\\\\\\\\\\\n
- CO₂: At ambient atmospheric levels (~400 ppm) for normal growth; elevated CO₂ (1000-1500 ppm) increases growth rate at higher light intensities \\\\\\\\\\\\\\\\n
- Water: Consistent moisture with excellent drainage — cannabis roots require oxygen and are highly susceptible to overwatering and root rot \\\\\\\\\\\\\\\\n
- Nutrients: Nitrogen-dominant in vegetative growth; phosphorus and potassium-dominant in flowering \\\\\\\\\\\\\\\\n
- pH: Precise pH management is non-negotiable — soil 6.0-7.0; hydro/coco 5.5-6.5 \\\\\\\\\\\\\\\\n
- Temperature: 20-28°C day, slightly cooler nights; wide temperature swings stress plants and reduce terpene production \\\\\\\\\\\\\\\\n
- Humidity: High during seedling (65-80% RH), moderate during veg (50-70%), low during flowering (40-55%) to prevent cannabis mold guide \\\\\\\\\\\\\\\\n
Growing Medium Options
\\\\\\\\\\\\\\\\n\\\\\\\\\\\\\\\\nSoil
\\\\\\\\\\\\\\\\nThe most forgiving medium for beginners and the most commonly used by home growers. Quality cannabis-specific soil (such as BioBizz All-Mix, Fox Farm Ocean Forest, or similar) comes pre-charged with nutrients and beneficial microorganisms. The soil's buffering capacity makes pH mistakes and minor nutrient errors less catastrophic than in sterile media.
\\\\\\\\\\\\\\\\n\\\\\\\\\\\\\\\\nOrganic growing in living soil — maintaining microbial life with minimal synthetic inputs — is the most advanced soil approach and produces cannabis with exceptional terpene complexity. This requires more knowledge and patience but less precise nutrient management.
\\\\\\\\\\\\\\\\n\\\\\\\\\\\\\\\\nCoco Coir
\\\\\\\\\\\\\\\\nCoconut husk fiber is inert (unlike soil), meaning the grower controls all nutrients. Coco has excellent air-to-water ratio, promotes faster growth than soil in skilled hands, and drains well. It requires more frequent feeding and precise pH management (5.5-6.5) but rewards attentive growers with faster vegetative growth and potentially higher yields.
\\\\\\\\\\\\\\\\n\\\\\\\\\\\\\\\\n
Hydroponics
\\\\\\\\\\\\\\\\nGrowing in nutrient solution without any solid medium (DWC — Deep Water Culture, NFT, Aeroponics) provides maximum control and maximum growth rates. Cannabis plants in optimal hydroponic setups grow significantly faster than soil-grown counterparts. However, hydroponics has zero buffer — a pH spike or nutrient imbalance affects plants within hours rather than days. Not recommended for beginners.
\\\\\\\\\\\\\\\\n\\\\\\\\\\\\\\\\n
Lighting: The Most Critical Investment
\\\\\\\\\\\\\\\\n\\\\\\\\\\\\\\\\nLight is the single most important controllable variable in indoor cannabis cultivation. Cannabis produces more cannabinoids and terpenes at higher light intensities — up to a saturation point of approximately 1500-1800 µmol/m²/s PPFD.
\\\\\\\\\\\\\\\\n\\\\\\\\\\\\\\\\nLED Quantum Board (Recommended)
\\\\\\\\\\\\\\\\nModern quantum board LEDs (Samsung LM301B/H diodes, HLG, Mars Hydro, Spider Farmer) offer the best efficiency (µmol/J), full spectrum output, and lowest heat generation for indoor use. For a 1.2x1.2m space, 300-400W actual draw is appropriate. Target PPFD of 600-1000 µmol/m²/s in vegetative, 800-1400 µmol/m²/s in flowering.
\\\\\\\\\\\\\\\\n\\\\\\\\\\\\\\\\nHID (HPS / CMH)
\\\\\\\\\\\\\\\\nHigh-pressure sodium (HPS) and ceramic metal halide (CMH/LEC) lights remain popular among experienced growers for their proven track records and specific spectrum qualities. HPS in particular is associated with exceptional bud density. The trade-off is higher heat output requiring more robust ventilation.
\\\\\\\\\\\\\\\\n\\\\\\\\\\\\\\\\nVPD and Light Interaction
\\\\\\\\\\\\\\\\nVapor Pressure Deficit (VPD) — the relationship between temperature and humidity — determines how efficiently plants transpire and uptake nutrients. At higher light intensities, plants need higher VPD (warmer temperatures, lower relative humidity) to transpire efficiently. Matching VPD to your light intensity prevents stunted growth even with excellent nutrients.
\\\\\\\\\\\\\\\\n\\\\\\\\\\\\\\\\nTraining Techniques to Maximize Yield
\\\\\\\\\\\\\\\\n\\\\\\\\\\\\\\\\nTraining cannabis plants to spread horizontally rather than grow as a single tall cola dramatically increases yield from the same light footprint.
\\\\\\\\\\\\\\\\n\\\\\\\\\\\\\\\\n
Low-Stress Training (LST)
\\\\\\\\\\\\\\\\nGently bending and tying branches horizontally during vegetative growth creates a flat, even canopy with multiple main colas. LST is suitable for autoflowers and photoperiod plants alike. It requires no cutting and plants recover immediately. Yield increases of 30-50% over untrained plants are common from the same grow space.
\\\\\\\\\\\\\\\\n\\\\\\\\\\\\\\\\nSCROG (Screen of Green)
\\\\\\\\\\\\\\\\nA horizontal screen is placed 30-40cm above the growing medium. As the plant grows, branches are woven through the screen to create an even canopy across the entire screen area. SCROG is best for photoperiod plants with a longer vegetative period to fill the screen fully. Extremely efficient use of light.
\\\\\\\\\\\\\\\\n\\\\\\\\\\\\\\\\nTopping and FIMing
\\\\\\\\\\\\\\\\nTopping (cutting the main growing tip) creates two main colas from one. FIMing (cutting 75% of the main tip) creates 3-4 growing tips. Both techniques are applied 2-3 times during vegetative growth to multiply the number of primary bud sites. Topped plants need 1-2 weeks recovery time.
\\\\\\\\\\\\\\\\n\\\\\\\\\\\\\\\\nDefoliation
\\\\\\\\\\\\\\\\nStrategic removal of fan leaves during late vegetative and early flowering allows light to penetrate deeper into the canopy. Aggressive defoliation is controversial — the correct amount depends on plant health, strain, and grow environment. Remove only leaves that block light from developing bud sites; do not defoliate stressed plants.
\\\\\\\\\\\\\\\\n\\\\\\\\\\\\\\\\nNutrient Management
\\\\\\\\\\\\\\\\n\\\\\\\\\\\\\\\\nCannabis nutrient management follows a consistent pattern across all growing media:
\\\\\\\\\\\\\\\\n\\\\\\\\\\\\\\\\n- \\\\\\\\\\\\\\\\n
- Vegetative (N-P-K ratio approximately 3-1-2): Nitrogen-dominant feeding supports rapid vegetative growth. Watch for light green new growth (N deficiency) or dark-claw leaves (N toxicity). \\\\\\\\\\\\\\\\n
- Early flower (approximately 1-3-2): Reduce nitrogen as flowers initiate. Increase phosphorus and potassium to support bud development. \\\\\\\\\\\\\\\\n
- Mid-late flower (approximately 0-3-3): Minimal nitrogen, maximum PK. Many growers add bloom boosters containing additional phosphorus and calcium-magnesium. \\\\\\\\\\\\\\\\n
- Final 1-2 weeks (flush or reduce feeding): Whether "flushing" improves flavor is debated. Evidence is mixed, but most growers reduce or eliminate nutrients in the final weeks regardless. \\\\\\\\\\\\\\\\n
Essential principle: Start at 25-50% of manufacturer-recommended doses. It is always easier to increase nutrients for deficiency than to flush out toxicity. Healthy, well-fed cannabis has vibrant green leaves without curling or discoloration.
\\\\\\\\\\\\\\\\n\\\\\\\\\\\\\\\\nIdentifying and Fixing Common Problems
\\\\\\\\\\\\\\\\n\\\\\\\\\\\\\\\\nMost cannabis growing problems manifest as leaf symptoms. The most common:
\\\\\\\\\\\\\\\\n\\\\\\\\\\\\\\\\n- \\\\\\\\\\\\\\\\n
- Yellow leaves (bottom of plant, spreading upward): Nitrogen deficiency. Increase N feeding. Note: some yellowing is normal in late flowering as the plant draws nutrients from lower leaves. \\\\\\\\\\\\\\\\n
- Yellow leaves with green veins: Iron or magnesium deficiency — often caused by wrong pH locking out nutrients rather than actual deficiency. Check pH first. \\\\\\\\\\\\\\\\n
- Brown crispy leaf tips: Nutrient burn (too much fertilizer) or underwatering. Check both. \\\\\\\\\\\\\\\\n
- Curling leaves (down-claw): Nitrogen toxicity, overwatering, or heat stress. \\\\\\\\\\\\\\\\n
- White powdery coating on leaves: Powdery mildew. Treat immediately with potassium bicarbonate spray. Increase airflow and reduce humidity. \\\\\\\\\\\\\\\\n
- Grey fuzzy growth on buds: Botrytis (bud rot). Remove affected buds immediately. Cannot be treated — only prevented through humidity control. \\\\\\\\\\\\\\\\n
Harvest Timing: Reading Trichomes
\\\\\\\\\\\\\\\\n\\\\\\\\\\\\\\\\nHarvest timing is the most impactful skill advanced growers develop. The cannabinoid profile changes significantly during the final weeks of flowering:
\\\\\\\\\\\\\\\\n\\\\\\\\\\\\\\\\n
Use a jeweler's loupe (30-60x) or USB microscope to examine trichomes on sugar leaves adjacent to buds:
\\\\\\\\\\\\\\\\n\\\\\\\\\\\\\\\\n- \\\\\\\\\\\\\\\\n
- Clear trichomes: Immature — THC not yet at maximum. Do not harvest. \\\\\\\\\\\\\\\\n
- Milky/cloudy white: THC at peak. Effects will be more energetic, cerebral. \\\\\\\\\\\\\\\\n
- Amber trichomes: THC degrading to CBN. Effects become more sedating. \\\\\\\\\\\\\\\\n
Most growers harvest at: 70-80% cloudy, 10-20% amber for a balanced effect profile. For maximum sedation: harvest with more amber. For maximum clarity: harvest when majority are still cloudy.
\\\\\\\\\\\\\\\\n\\\\\\\\\\\\\\\\nPistil color alone is unreliable for determining harvest maturity — trichome inspection is essential for accurate timing.
\\\\\\\\\\\\\\\\n\\\\\\\\\\\\\\\\nDrying and Curing for Maximum Quality
\\\\\\\\\\\\\\\\n\\\\\\\\\\\\\\\\nThe post-harvest process has as much impact on final quality as growing conditions. A perfectly grown plant can be ruined by poor drying and curing.
\\\\\\\\\\\\\\\\n\\\\\\\\\\\\\\\\nDrying: Hang whole branches or plants upside down in a dark room at 18-22°C, 50-60% RH with gentle airflow (not directly on buds). Target a 7-14 day dry — slower drying preserves terpenes. Dried properly, small stems snap rather than bend.
\\\\\\\\\\\\\\\\n\\\\\\\\\\\\\\\\nCuring: Place trimmed buds in airtight glass jars (mason jars). Fill jars 75-80% full. For the first 2 weeks, "burp" jars 1-2 times daily by opening for 15-30 minutes to release moisture and CO₂. Humidity inside jars should stabilize at 55-65% RH (use Boveda 62% packs for precise humidity control).
\\\\\\\\\\\\\\\\n\\\\\\\\\\\\\\\\nMinimum cure: 2-4 weeks. Optimal cure: 6-8 weeks. Well-cured cannabis has markedly smoother smoke/vapor, superior flavor complexity, and longer shelf life. The chlorophyll that creates harshness continues breaking down throughout the cure.
\\\\\\\\\\\\\\\\n\\\\\\\\\\\\\\\\nGrowing Cannabis Legally in Germany (2026)
\\\\\\\\\\\\\\\\n\\\\\\\\\\\\\\\\nUnder Germany's Cannabis Act (CanG), adults may legally cultivate up to 3 cannabis plants for personal use at their primary residence. Plants must not be visible from public space and must be kept inaccessible to minors. Commercial sale of home-grown cannabis is not permitted.
\\\\\\\\\\\\\\\\n\\\\\\\\\\\\\\\\nThis framework makes Germany one of the more cannabis-cultivation-friendly jurisdictions in Europe for personal growers, though it remains more restrictive than jurisdictions that permit commercial home sales or larger personal plant counts.
\\\\\\\\n\\\\n\\n\nRelated Articles
Frequently Asked Questions
Written by
The Green Treasure Editorial Team
Independent cannabis journalism backed by science. We cover terpenes, vaporizers, edibles, growing and health.
Stay in the green loop
Expert guides, terpene science, growing tips, and gear reviews — delivered to your inbox. No spam, ever.
No spam. Unsubscribe anytime.